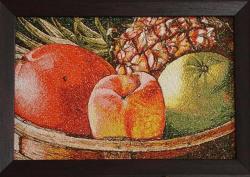
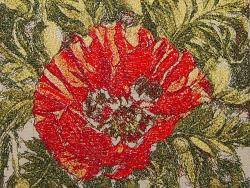
In this master class we will try to answer two questions which are often asked us by buyers and simply guests of our Design Gallery: «What is a Photo Stitch?» And «How to stitch out it?»
Click on the picture to enlarge
 Probably, every owner of the embroidery machine has the desire to stitch out pictures. And the Photo Stitch Technique suits it very much for this purpose. Process of such embroidery looks like the work of the artist putting color dabs on a canvas and mixing tone. The result after masterful executed design and harmoniously picked up colors of threads, impresses very much.
No especially difficult receptions in design embroidery by the Photo Stitch are present, but there are some subtleties about which I will try to tell you more below.
 At first there is some theory. The Photo Stitch is "know-how" of manufacturers of program PE-DESIGN. The techniques is multilayered and multi-color embroidery when stitches are put by the embroidery machine chaotically enough, often over others, providing with it that volume of the image and modulations of tones.
For Machine Embroidery Designs in this Technique there are following characteristic features:
- big enough sizes of a field of the embroidery (at width and height) (as in designs of the small size the Photo Stitch turns out unimportant quality);
- a considerable quantity of stitches (up to 200 000 stitches for design in the sizes 200 on 300 mm);
- high density of the ready embroidery;
- a considerable quantity of colors in design (for Multi-Color Photo Stitch Designs);
- a considerable quantity arising in the course of jump stitches (it is not obligatory, but it is frequent).
Receptions and embroidery methods also follow from these features.
So, the high density of design dictates necessity to stabilize the embroidery very well . Also, because of density scope of application of such embroideries is narrowed. For example, on a T-shirt in the Photo Stitch Technique hardly it will be possible to embroider design well. Keep also in mind that a considerable quantity of stitches creates the raised loading on your embroidery machine.
The considerable sizes of a field of the embroidery for owners of embroidery machines with a small hoops mean necessity to stitch out design parts and to align these parts with each other. In the given master class about alignment we won't speak, this theme is considered separately.
A considerable quantity of necessary colors of threads, frequently close to each other on a shade, does process of their selection by responsible and uneasy matter. And also it makes buy more and more threads for the embroidery :)
A considerable quantity of jump stitches make disconnect the mechanism of automatic trimming (if it is present at the embroidery machine) and cut off them by hands throughout all embroidery of design. The occurrence reason of the jump stitches is in the mechanism of work of program PE-DESIGN when stitches and transitions between them are generated by the program automatically. It is possible to remove jump stitches from design manually, but process is labor-consuming and is possible not always (There are designs of machine embroidery in the Photo Stitch Techinique, free from jump stitches in our Gallery - you can read comments to the designs).
It seems that there are continuous difficulties…. But the result is worthy of it! And when from under a needle of your embroidery machine there is practically a work of art in stitches, there will be no limit to your satisfaction!

No comments:
Post a Comment